Topics in Photographic Preservation 2001, Volume 9, Article 3 (pp. 61-64)
This paper discusses the treatment of filling the image layer loss of a tintype and the follow-up experiments to look into the issues concerning the possible effect of the added material on the iron support. The loss was filled with cast gelatin film that was toned with watercolor and varnished with Paraloid B-72 to match the appearance of the original. Follow-up experiments showed that if the iron support was not properly protected, rust might occur after the gelatin film was attached. The iron support when pre-treated with tannic acid, however, appeared to be stable after three weeks in a humidity chamber. The final results of these tests will be presented in the next Topics.
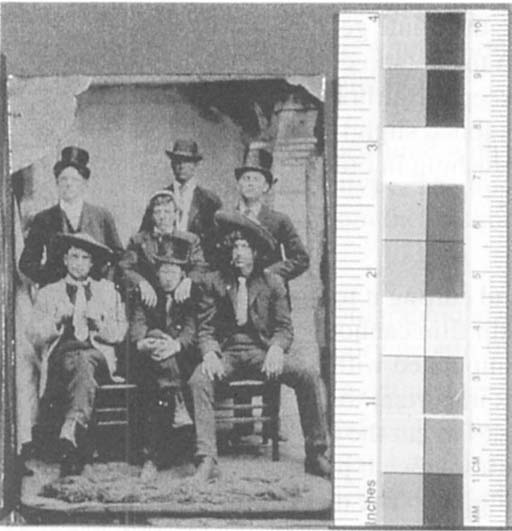
Many new conservation treatments are developed because the conservator is faced with a problem that has not been solved jet. Such is the case with the tintype in Figure 1. It is a particularly interesting image that shows seven young men wearing all sorts of different hats. The scene conveys a sense of their close friendship and the fun it must have been for them to have their picture taken at a photo studio.

Figure 1. before treatment
The plate was in good condition except for the losses of collodion image layer and black lacquer seen at both upper corners. This damage was caused by the iron support having been bent, which caused the emulsion and lacquer to release. Though stripped bare and exposed to the environment, the iron support of the damaged areas did not exhibit visible rust. This indicates that the damage happened fairly recently. This alone would probably not present a problem, since it is unlikely that the iron corrosion will continue if the tintype is kept in a well controlled environment. Of concern to us was, however, the visual distraction of the two losses in viewing the image. In order to re-integrate the appearance of the photograph we decided to perform a cosmetic treatment after we had obtained permission from the owner.
While thinking over this treatment, we first had to consider the quality of the fill materials to be used. They had to be stable, chemically compatible with the original materials, and they were not to interfere with any future treatment or scientific analysis of the original substrate. In addition to these considerations, we were challenged to find a way of making an inconspicuous and aesthetically compatible fill. This means that; first, the fill needs to match the thickness of the loss. Second, the surface texture and gloss must be similar to that of the varnished collodion emulsion. Third, the inpainting that was to be applied to the fill must match the continuous tone of the image. We felt that just building up the thickness of the loss with acrylic colors or pigments mixed with different binders would not give a satisfactory result.
While considering our alternatives, it occurred to us that to obtain a fill with an even and smooth surface, it might be advantageous to cast a film. Allowing the liquid film material to flow across a perfectly horizontal plane with a smooth surface, it would first level and then dry evenly. A wooden tripod with a smooth platform used to hold a 4×5 camera served very well for our purpose. It provided a means of establishing a level surface for the casting (One can also use Play-doh underneath the center of a piece of glass to achieve a leveled plane.) Photographic grade gelatin was chosen as the fill material because its working properties were perfect for our task: gelatin is a viscous liquid while warm; and we found that it can be easily tinted if watercolor is incorporated in the liquid.
The loss on the tintype was measured with a micrometer, using a piece of silicone release Mylar® to protect both sides of the tintype. The thickness of the loss was calculated by subtracting the thickness of the bare metal from the thickness of the undamaged tintype. It was found to be 6.0/1000 inch.
A five percent solution of photographic grade gelatin in de-ionized water was used to cast the films. We were able to make dry gelatin films of different thickness by applying different quantities of liquid gelatin in a defined area on a piece of 5 mil Type D Mylar®. (Silicone release Mylar® was tried and found to have too much surface tension to spread the gelatin solution to a uniform thickness: the cast gelatin had a strong tendency to bead up, the samples didn't hold their cast shapes, and they lifted and curled as they dried, making them useless for fills.) A piece of graph paper was placed underneath the Mylar® to guide the delivery of the gelatin solution to the 4×4 cm square area that we had mapped out to create a fill material for our treatment. The Mylar® and graph paper assembly was secured with masking tape onto the leveled tripod platform. The tape had to cover all around the edges of the Mylar® in order to prevent the Mylar® from curling while the gelatin was drying. There was just enough surface tension between the warm gelatin and the uncoated Mylar® to keep the solution from spreading too far. A bamboo skewer was very helpful to guide the liquid gelatin to fill the 4 × 4 cm square.
The initial trials were aimed at finding the right thickness of the film. Five films were cast with 30, 35, 40, 45, and 50 drops of warm gelatin respectively, each dried in a 4 × 4 cm square. It took about one day for the solution to dry. The gelatin films dried with a beautiful gloss and could be released from the Mylar® easily. The thickness of the films was measured with a micrometer at the center of the films. We found that a film dried from 35 drops of 5% gelatin solution produced a film of 5.0/1000 inch, just slightly thinner than the loss.
As already mentioned, liquid gelatin can be easily toned with watercolor. The addition of the watercolor (in this case, Chinese white, lamp black, and yellow ochre) turned the gelatin film opaque, making it look surprisingly similar to the collodion emulsion. The two sides of the gelatin film exhibit different shades and degrees of gloss: the side dried against the Mylar® exhibits higher gloss and a cooler tonality than that exposed to the air. For this tintype, the air-dried side of the film had a better match in color than the other side.
There were design elements in the loss area that needed to be recreated in order to make the insert less noticeable. Because of the slick surface and nonporous surface, gelatin film does not receive brush stroke as easily as a paper fill. An airbrush was used to create the general image that was missing in the loss area. There was no record of the photograph to show what was present in the missing section. We decided to make a gradual transition from the original image to the fill by continuing the column seen in the original image into the fill area. Our intention was not to create a new design but to create an insert that would recede visually into the background and not draw the viewers' attention away from the original image.
To be able to use toned liquid gelatin with the airbrush, the dilute gelatin solution was kept warm over a pot of hot water. We did run into difficulty with the gelatin cooling and clogging the airbrush nozzle. It would have been advantageous to keep the airbrush nozzle in warm water when it was not in use. The dilute gelatin solution was toned slightly with lamp black. Mylar templates were made to block certain areas during airbrushing in order to create the shapes and shades of the design for the fill.
Because the gelatin film was quite rigid, trimming it and cutting it to match the loss area proved to be a difficult task. Unlike a sheet of paper, the gelatin film cannot be shaped to produce a very neatly fitting joint. Though the gelatin film can be manipulated with a small amount of water to soften the edges to make fitting easier, it is nonetheless important to cut the edge as exact as possible. Photocopies of this tintype were used as guides to cut the fill. Two photocopies were aligned with the fill that was placed in the middle, like a sandwich package. The bottom copy was used to align the design between the fill and the original. The other copy set on top of the fill as a guide for cutting. The non-joining edge of the fill was left untrimmed for easy handling during attaching.
In preparing the tintype for inserting the fill, the bare metal in the loss area was coated twice with 15% Paraloid B-72 in toluene with a brush. The plate was left in the fume hood to dry overnight. Taking advantage of gelatin's ability to be softened with moisture, synthetic emulsion adhesive Beva D-8 was used to adhere the fill to the metal plate. A one-to-one dilution of Beva D-8 with deionized water was brushed onto the back of the fill, and, sparingly, along the edge to be joined with the original. The water in the diluted adhesive emulsion swelled and softened the gelatin just enough to conform the film to the bent metal support. The excess non-joining edge was trimmed after the fill was secured.
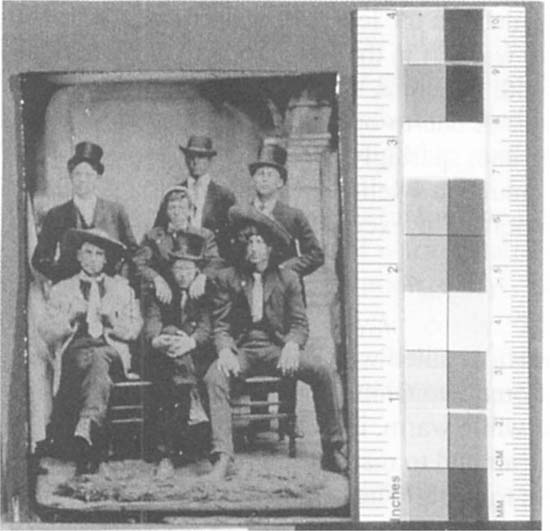
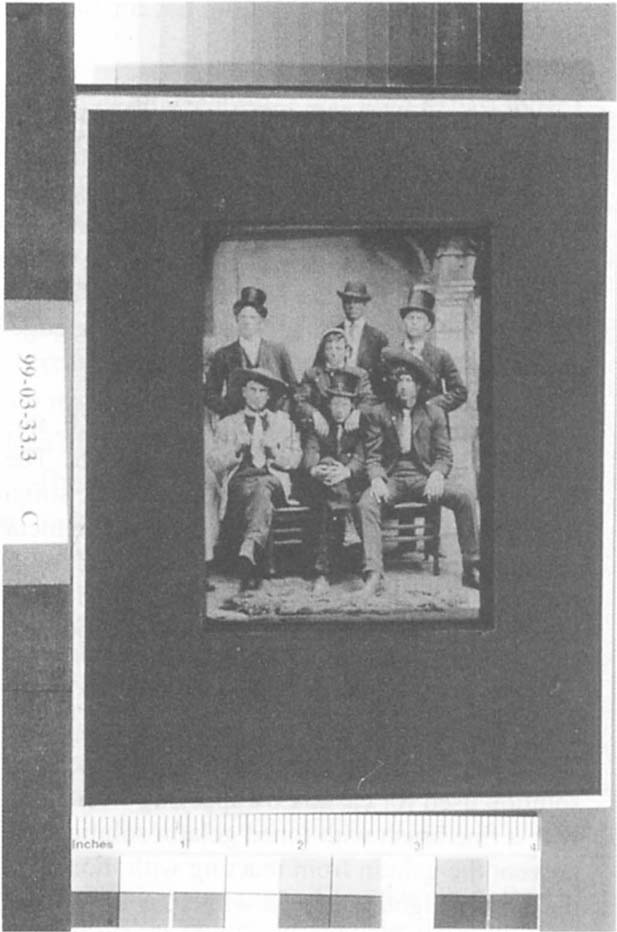
There were still tiny gaps at the joint, which were carefully filled with the same toned gelatin solution used for casting by applying with a brush. Some retouching could be carefully done with a fine brush with toned gelatin solution, applied while warm, in the fashion of dots. To prevent the gelatin from reacting with moisture in the air and to match the gloss of the original, the fill was lightly sprayed with 10% B-72 solution in toluene. The original was protected with a piece of Mylar® during this step. Finally, the treated tintype (Figure 2) was housed in a sink mat made with unbuffered, 4 ply white Photomount board with a facing mat cut from Arches Cover Black, glazed with glass, and sealed with Filmoplast® P90 along the edges (Figure 3).

Figure 2. after treatment

Figure 3. after rehousing
The authors would like to thank the following colleagues who gave their input and help to this treatment and the follow-up experiments: Nancy Heugh, paper conservator at the Heugh-Edmondson Conservation Services; Doris Couture-Rigert, object conservator, National Gallery of Canada; Colleen Day, object conservator, Parks Canada; Judy Logan, object conservator, and Lyndsie Selwyn, conservation scientist, from Canadian Conservation Institute.