Topics in Photographic Preservation 2003, Volume 10, Article 15 (pp. 139-150)
Paper presented at 2003 PMG/EMG Joint Session of the AIC Meeting in Arlington, Virginia.
The interest in displaying paper negatives dates from 1839–41, when Fox Talbot exhibited his own. Paper negatives have recently become appreciated by curators, collectors and the museum- going public. They appear frequently in exhibitions around the world. Paper negatives have been exhibited in big institutions like the Metropolitan Museum in New York, musee d’ Orsey in Paris, the Victoria & Albert Museum in London, the Getty Institute in Los Angeles, and recently the George Eastman House in Rochester. The 2001 exhibition of “British Paper Negatives” from the Hans P. Kraus collection in New York 2001 fanned the growing interest. Significant numbers of paper negatives were sold for record prices at Sotheby's Paris sale of the Marie-Terese and Andre Jammes collection.
A paper negative is a camera latent image on paper support based on the sensitivity of silver iodide (alone, or in combination with chloride, bromide, floride) which is developed out with a reducing agent and subsequently fixed to remove the unused halides.
There were two major processes for producing paper negatives in the 19th century:
Unwaxed (calotype) or waxed, either overall or selectively after producing (calotype)
Waxed paper process (waxed paper before sensitizing)

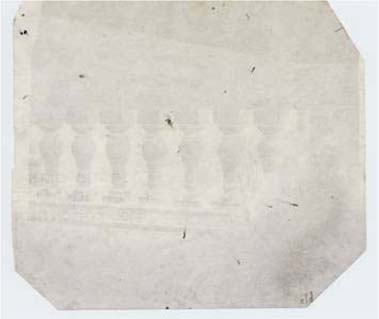
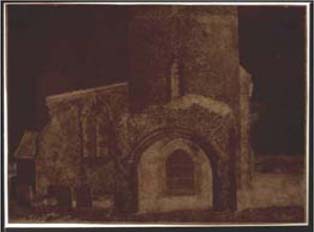
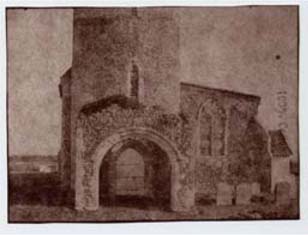
Unwaxed calotype negative (front).
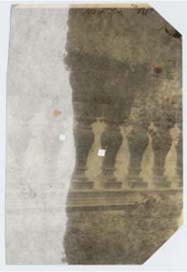
Half-waxed calotype (back).
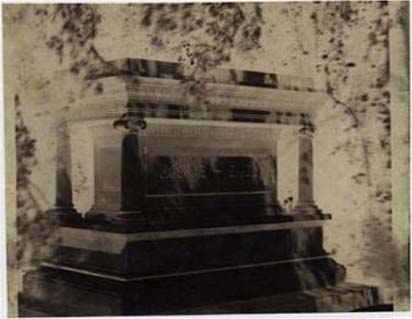
Waxed paper process (front).
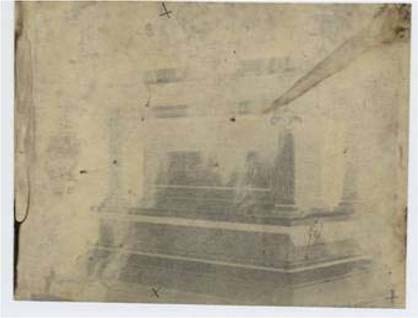
Waxed paper process (back).
Even if we assume that paper negatives are relatively stable to the light, the question is how safe is it to exhibit them, especially by transmitted light? Theoretically most of them have been tested by light already, because they were intended for exposure to light during printing. However, we should understand that most of them are not just prints developed by chemicals on paper, they are complex objects. From the survey of the GEH collection it is clear that in many cases they are waxed paper with a photographic image. How does this complex assembly react to heat and light?
On June 5, 2002, Grant Romer, the director of Advanced Residency Program (ARP) in Photograph Conservation at George Eastman House introduced a collaborative paper negative project. Different research topics relating to paper negatives were investigated by the ARP fellows:
Connoisseurship
Characterization and condition monitoring
Duplication
Facsimilation
Housing
Treatments on paper negatives
Facsimilation of Paper negatives is the topic of this paper.
Curators and collectors use replicas and facsimiles when appropriate, and often ask photo conservators to make them. Why would such a project be given to a photo-conservator?
There are two reasons for this. First, the photo-conservator has the knowledge of the process used to make the original artifact. Second, he or she understands the types of typical deterioration.
Kate Jennings, a 2001–2003 ARP fellow did research related to 19th century paper negatives. As a part of this project she investigated the effects of light on different types of negatives. Working with the Image Permanence Institute, she conducted accelerated light fading tests on surrogate samples made using 19th century formulas. After exposure to 300.000 lux hours the yellow beeswax that was used for both the pre-waxed and post-waxed processes was bleached significantly by the light. The paper in the sample without wax was also slightly bleached.
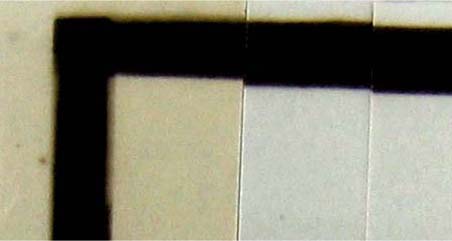
Control on the left, bleached paper and wax on the right.
While paper negatives are relatively light stable, collections have been cautious in exhibiting them, especially by transmitted light. Since many institutions have quality facsimiles of other types of photographs made for exhibition purposes (Metropolitan museum, George Eastman House, etc.), the author wished to explore the possibility of making facsimiles of paper negatives for display, educational purpose and future printing.
The dictionary defines “facsimile” as an exact copy.
There is no a protocol for paper negative facsimiles. It is very difficult to make exact copies of a paper negative, because of the complexity of this object.
The facsimile should look the same way as the original by reflected light.
The facsimile should look the same as the original by transmitted light.
It should be printable for making positives. It should be easy to make.
While accomplishing all these criteria is almost impossible, convincing facsimiles can be produced based on the following experiments. It is important to understand that making such surrogates is more art than science.
Salted paper “negative” prints from conventional film interpositives of the original.
Ink jet prints from a digital scan of the original.
Developed-out and printed-out salted paper negative prints from a digital interpositive of a scanned original.
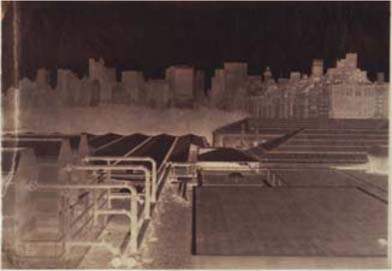
Reflected light
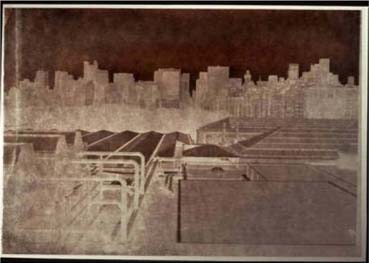
Transmitted light
For this project I initially chose a calotype negative, which I produced during the Mellon Workshop on “Nineteenth Century Silver-Based Photographic Processes”, February 2002.
The conventional method to provide an interpositive is to treat the paper negative as any film negative. In this procedure the interpositive was made by exposing the original negative in direct contact with Delta 100, HP5 and FP4 film by Ilford (8×10).
A few different conventional interpositives were produced. Stronger developer formulas and/or longer development produced a gain in overall density.
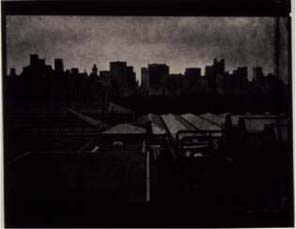
B/W “Ilford” Delta 100
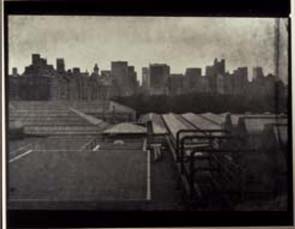
B/W “Ortho” film
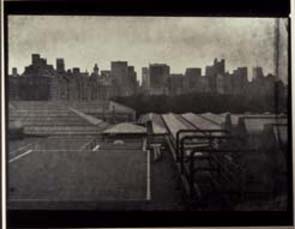
B/W “Ortho” bleached and toned
The density of Ortho film interpositive was increased by a bleach and intensifying treatment. Equal parts of 2% solution of potassium bromide and 2% solution of potassium Ferricyanide were mixed for the bleaching bath. The film was treated in the bath until the silver image was bleached through to the film base.
After a short water wash, the film was toned in a 2% solution of sodium sulfide until a visual change was complete.
This bleached out and toned interpositive resulted in overall gain in density. It was chosen as the final inter positive for making facsimile.
Next step was making salted paper prints from this interpositive.
The image is negative on these prints, so we will refer to them as salted paper negative facsimiles.
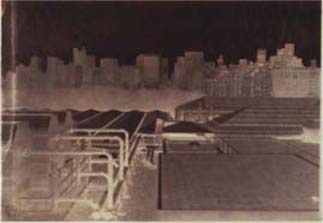
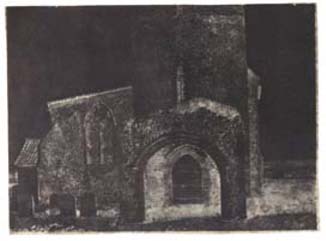
Original calotype

Three salted paper print facsimile
The conventional method of making film interpositives is hard to use for several reasons.
There is no future for this method, as conventional film will be difficult to purchase in the near future.
It takes great skill to find the best exposure time and developer strength for producing the optimum interpositive.
Every time a generation is made, resolution of the film is reduced by half, so information is lost with multiple generations.
The next step is printing the negative salt print from the inter positive. It is very important to choose the right paper for printing. Thickness, sizing, and surface characteristics figure critically in the overall success of the final facsimile. 100% cotton Canson paper and Crobart paper were initially chosen for salt printing.
Salting solution:
• 2% gelatin
• 2% ammonium chloride
Sensitizing solution:
• 20% silver nitrate
Fixing solution:
• 15% Hypo + sodium bicarbonate
Hypo clearing solution:
• 2 % sodium sulfite
Exposure time was selected by inspection. Typically, the printed-out image should be darker than the desired look of the final print because subsequent fixing and washing often lighten the printed-out image significantly.
A conventional silver gelatin inter-positive is good enough for printing a reasonable facsimile, but there is some loss of detail.
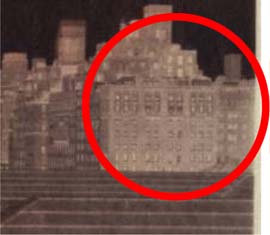
Original calotype (detail)

The same detail from three salted paper negative print facsimiles
A 19th century paper negative from the H.P. Kraus Jr. collection was chosen as the original image for making the next facsimile tests. A digital scan was used to produce both an ink jet negative print and a ink jet positive transparency on film.
The first step was to compare the quality of the 800 dpi scanned image as printed with Epson 836 XL and Epson 10000 printer. For this test, the original 19th century paper negative was scanned by transmitted light and printed out on 100% “Canson” paper dyed with tea. The image was good enough by reflected light, but even after waxing and trying different dyed papers the results were poor as viewed by transmitted light.
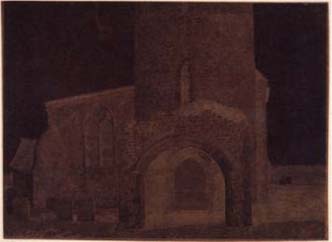
Original paper negative
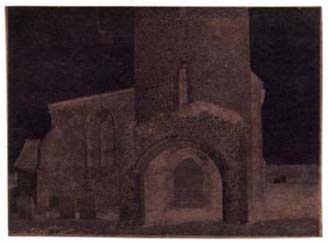
Paper negative facsimile printed out with an Epson 10000 printer from a scanned image (Epson 836 XL)
A different approach was taken for better results-a digitally-made inter-positive printed on “Pictorico” Premium OHP Transparency film with the same Epson 10000 printer. We used the directions published in the book “Making Digital Negatives for Contact Printing”, by Dan Burkholder to create digital inter-positives. The first tests showed that we needed more density in the interpositive for better results. After manipulating the characteristic curve with Adobe Photoshop we printed a new inter-positive with higher density. Salt prints made from this new inter-positive looked closer to original paper negative. However, it was very difficult to achieve that point, where the facsimile was successful by both reflected and transmitted light. The original paper negative looked very clear in the minimum density areas by transmitted light but was almost fully obscured by a brown fog when viewed by reflected light. By adjusting the curve on the digital interpositive the effect by transmitted light was improved, but the object by reflected light looked much brighter than the original paper negative. New paper negative did not display the overall brown fog visible in the original. After a second correction of the interpositive, the density in the salted paper prints was more acceptable particularly after exposing the paper to light for a second without the digital interpositive.
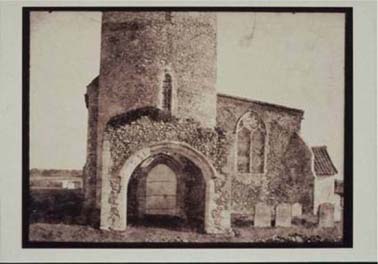
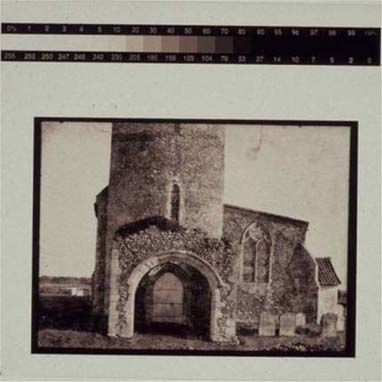
Two different digital inter-positives illustrating different density
Easy to make
Easy to manipulate the characteristic curve
Conventional films will not be available in the future
Less stressful for the original paper negative
More correct information on a digital inter-positive
Easy to print out a new one, when the inter-positive becomes damaged by use
Easy to make
Final printed out product looks very similar to the calotype process.
Possibility to control color tonality of a salted paper negative facsimile by toning with gold chloride. The longer toning time-the cooler the image.
100% cotton “Canson” paper
Acid free “Crobart” paper
100% cotton “Grains” paper
Lining paper from “Archivart
For this project was important to choose similar paper with original. It means it should be the same thickness, weight, sizing and color.
Finally we chose 100% “Grains” paper, as the best in this particular case.
Reflected Light
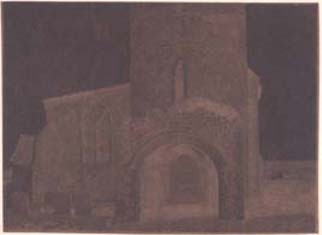
Original paper negative
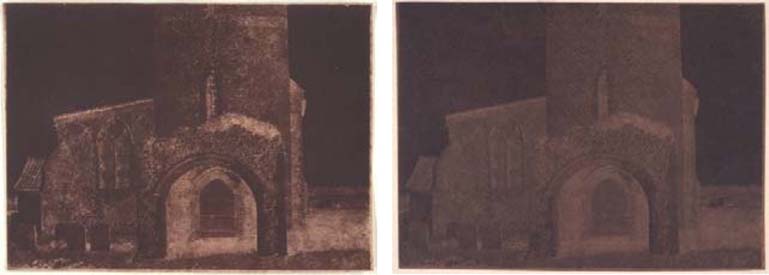
Two salted paper print facsimiles made from digital interpositive
Transmitted Light
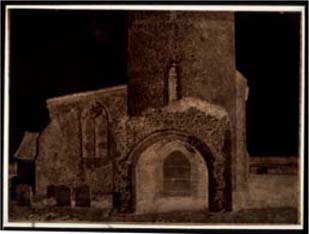
Original paper negative
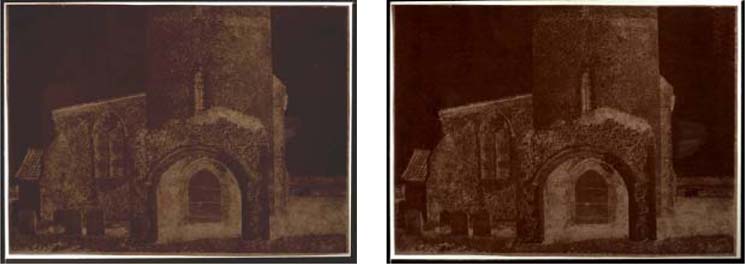
Two different salted paper print negatives
Printability of Digital Paper Negative Facsimile
Digital paper negative facsimile
Salted paper print from it
Salted paper prints have many advantages for making reasonable facsimiles.
The salted paper print is a print out process:
The shape of the silver particles is different from paper negative processes.
Salted paper prints are much less stable to light.
There is a difference in color between developed out and printed out images.
Image substance is penetrating much deeper into the paper support in developed out processes. This is the reason why image appearance from the back is much stronger in paper negative process as compared with salted paper process.
For increasing the image appearance from the back we decided to make developed salted paper negative prints from digital inter positive. This would bring the final image color closer to the original artifact.
Paper was salted with 2% gelatin and 2% ammonium chloride
The salted paper was sensitized under the safe (amber light). After the sensitizing solution was dried the paper was put in contact with the digital interpositive and exposed to sun light for 2–8 seconds. Developed out salted paper prints require very little exposure. The image is barely visible prior to development.
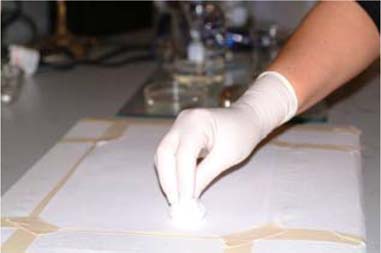
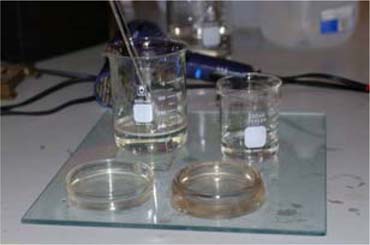
Sensitizing salted paper with 20% silver nitrate, under amber light
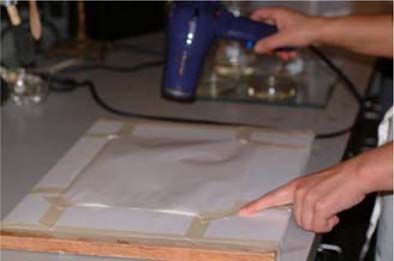
Drying the paper after sensitizing, using hair dryer under amber light.
Prior to development a piece of ¼ glass was leveled in the sink. Under amber safe light, the exposed paper was placed upon the leveled glass and gallic acid developer poured upon the surface. During development, cotton wadding was used to keep the surface wet with gallic acid. Development was stopped by washing the paper with distilled water. A conventional Hypo fixer was used.
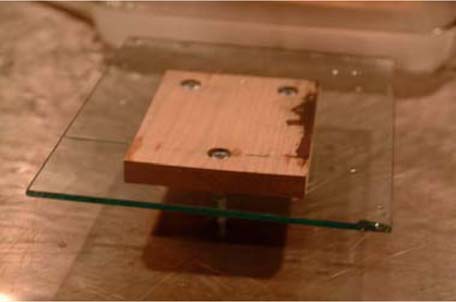
Leveling the surface for developing
An 0.8% solution of Gallic acid was used for development.
50ml. of Gallic acid,
10 drops of acetic acid,
3 drops of silver nitrate.
Color tonality-the longer development time - the cooler and more neutral color of developed salted paper negative print.
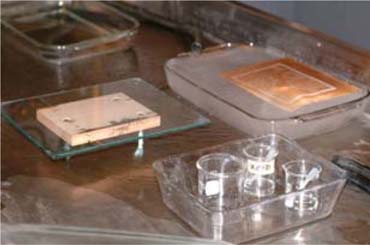
After washing in distilled water-fixing in 15% Hypo4–6 minutes. Washing in the running water
Developed salted paper prints are more stable then printed out images.
The image substance forms deeper inside the paper.
The back of a developed salted-paper-print displays more image.
Developed salted-paper-print paper negative has more common characteristics with a paper negative, (however, paper negatives are sensitized with silver iodide and developed-out salted paper prints are sensitized with silver chloride.)
Much easier to achieve the same color tonality as the original paper negative.
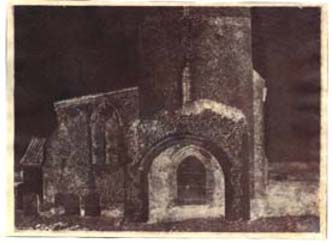
Developing time 10 min.
Developing time 15 min.
The important characteristics needed for a convincing facsimile:
Viewed by:
Transmitted light (front and back)
Reflected light (front and back)
Image tone
Printability. Is it possible a positive print be made from the facsimile?
We found we could not duplicate all of these characteristics with one process. This was not seen as a problem because the typical role of a facsimile is usually as a display surrogate. It is unlikely that such an object would be needed for exhibition and as a functional printing negative at the same time. Therefore, to produce a facsimile we need to determine for what purpose it would be made.
The real value of this project was learning about paper negatives. I learned to observe the subtleties of the originals. I gained an understanding of the limitations of different imaging technologies, old and new. I discovered that making convincing generic facsimiles of paper negatives is much easier than replicating special examples. All paper negatives are very different. It was an invaluable experience for me as a photo conservator.
Burkholder, D. 1999 (second edition), Making Digital Negatives for Contact Printing. Bladed Iris Press, USA.
Daffner, L. 1995. Examination and Investigation of 19th Century Paper Negatives. A study of Process, Materials, and Deterioration Characteristics. Topics in Photographic Preservation. Vol. 6, p.1–10.
Daffner, L. 1993. The John Shaw Smith Collection: Condition Survey Report and Investigation of 19th Century Paper Negatives. Unpublished typescript. George Eastman House.
Jennings, Katherine. 2003. Research into the Conservation of Nineteenth Century Paper Negatives. Unpublished. George Eastman House.
Gershheim, Helmut & Alison. 1969. The History of Photography. McGraw-Hill Book Company
Kraus, Hans P. 2001. Sun Pictures, Catalogue Ten British Paper Negatives 1939–1864 Unpublished. New York. Hans P. Kraus Jr. Fine Photography.
Libois, A. 1865. Printing by Development. The American Journal of Photography. Vol. 8, No. 5.
Newhall, Beaumont. 1964. The history of Photography. The Museum of Modern Art, N,Y.
Schaaf, Larry J. 1992. Out of the Shadows, Hershel. Talbot & Invention of Photography. Yale University Press, New Haven & London.
Schaff, Larry, J. 2002. The Photographic Art of William Henry Fox Talbot. Princeton University Press, N.J.
Romer, G. 1986. Can We Afford to Exhibit Our Valued Photographs? Topics in Photograph Preservation, American Institute for Conservation, 1: 23–24.
Wagner, S. McCabe, C. & Lemman, B. 2001. Guidelines for Exhibiting Light Levels for Photographs. Topics in Photograph Preservation, American Institute for Conservation, 9: 127–8.
Ware, M. 1994. Mechanisms of image deterioration in early photographs. The sensitivity to light of WHF Talbot's halide-fixed images 1834–1844. Science Museum and National Museum of Photography, Film and Television.
Franklin I. Jordan 1940. Photographic Facts and Formulas. Silver Printing-Out Papers. American Photographic Publishing CO. Boston.
Papers Presented in Topics in Photographic Preservation, Volume Ten have not undergone a formal process of peer review.