
A site-specific artwork to span the distance of a corridor which joins the two central thematic halls was commissioned for the National September 11 Memorial and Museum, which was awarded to Spencer Finch for his proposal,“Trying to Remember the Color of the Sky on That September Morning”. The museum’s exhibition staff worked with the artist to design a suitable mounting understructure, which only revealed problems within days of the official opening.
 The underlying structure proposed by the exhibition staff was to mount the 2,983 pieces of heavy watercolor paper that make up the composition onto a steel mesh grid using bulldog clips. However, the artist’s desire was for the watercolors to appear to float, with a varied distribution – the clips restricted positioning to a linear grid, so the team worked to create a more randomly positionable mounting strip using earth magnets, contained in small coin enclosures affixed to the back of each component piece.
The work had to be installed during construction phase, and so when completed, the team wrapped it entirely in polyethylene sheeting. Despite these precautions, when checked prior to opening day, it was noted that a circular pattern of dirt, focused around the underlying magnets, had appeared upon pieces of the art work, which would be come to be called the “owl eyes” phenomenon.

For a quick fix, the visible dust was lifted in-situ with low-tack masking tape, but the team kept watch and eight weeks after opening, they repeated the cleaning upwards to a distance of eight feet from the floor level, based upon the ladder height. Due to high profile and high numbers, all exhibit maintenance has to be done after hours, and the work cannot be blocked from use or view, so scheduling and moving the scissor lift was prohibitive.
Knowing that repeated intensive cleanings were not a solution for an installation expected to last five years (and likely longer), the team considered a new mounting protocol for reinstallation that would reduce the attractive force of the magnets to atmospheric dust. The first intervention mocked up placed greater distance between the primary support and the magnet by embedding the mounting magnet into Velcro attached to the emptied magnet pocket but it was ultimately unsuccessful due to differential relative humidity causing curl of the papers away from the pressure sensitive adhesive on the back of the hook tape attached to the envelopes; the hook portion remaining attached to the loop up on the grid.
The dust/dirt were tested by both air sampling and particulate identification. The museum has a regular health and safety sampling protocol due to a high level of nuisance dusts from entries, and potential of asbestos release from the collections themselves. Interestingly, no iron was detected in the air sample, potentially because the deposition settles at a rate too slow or is too diluted over a volume for an eight hour test. Conversely, particle identification showed that seventy-five percent of the dust were definitively iron particles. Environmental sources for airborne iron in cities such as include vehicular traffic exhaust, brake dust, incinerators and more. (An aerial view of the site was provided to show adjacent high-contaminant zones, and sources of pollution near the intake vents.) Although the intake air for the museum is filtered, there are many sources of these at the densely settled and circulated location at the tip of Manhattan that can also enter via the access doors, loading dock, and on dust carried by visitors and staff. The thought that dust was one-time construction related was disproved, from having noted that other objects in cases that mounted with magnets around the same time do not have the same problem.
Therefore, with cooperation from the artist, elimination of the magnets was decided to be the best solution. In the full intervention, the team sliced away the leading side of the coin pockets, removed the magnet, and placed the pressure sensitive adhesive Velcro onto the remnant pocket, a total of 11,932 instances, which was performed in overnight shifts over four weeks. Unfortunately, within a few weeks, this was shown to be ultimately unsuccessful due to differential heating and cooling of the front of the artwork causing curl and failure of the pressure sensitive adhesive (from which to which?). A new round of testing was undertaken, with a goal to maintain the artist’s careful non-linear placement, by continuing to depend on the hook and loop attached to the wall mesh. The primary supports were carefully adhered overall to a mat board, which would be pressed to the receiving tape, now stapled through the mount support.
 These test mounts using extra paintings supplied by the artist, were installed between the upper two air vents for an observation period. When the new method proved successful, 150 facsimile prints made from digital captures of the artwork components were created as placeholders while the artwork components were switched out overnight for remounting, so as to avoid interruption for the visitors, numbering in the thousands daily, and include in rapid succession heads of state, such as the Presidents of the United States, the Duke and Duchess of Cambridge, and the Pope.
The question and answer period was lively with the following exchanges:
Q: if dust is still in the air, is that not a problem elsewhere for unglazed works such as paintings?
A: Yes, dust has been noticed also on vertical surfaces, and so there is a regular housekeeping program to clean these
Q: How do you protect against fading for this long exhibition?
A: In discussions with the artist, he selected Winsor & Newton colors with the highest lightfastness ratings, plus created digital captures. If fading becomes noticeable, they will be replaced with digital facsimiles, and there is a record copy of the artworks to compare against for the long term 5 year timeline, but that could be extended.
Q: [Gwen Spicer, conservator and author of a forthcoming book on magnets in conservation commented:] Noting that aerosols of particulates can be up to 10-20% in cities’ air [for more info on particulate matter and Air Quality Index, see data from the Environmental Protection Agency]. The particle size is critical to the attractive force – and in lower Manhattan with it many towers, you have a canyon effect for intake of highly concentrated flows of fine iron oxide particulates. This is a real health issue – and research is ongoing into low tech ways of finding and binding pollutants. In Oregon, tree moss is being used as a particle sink to identify pollutant sources. Also, it is now common for computers to have magnetic shielding/filtering to protect electromagnetic media, but not buildings. [In a suggested technology transfer, she noted] Could RFID blocking scrim be repurposed to protect indoor air?
Q: Why was choice made to use Lascaux in uncontrolled environment, versus paste & paper? Why were the artworks mounted to another hygroscopic board overall versus an inert support – was there a weight issue?
A: The choice was due to the need to turnaround multiple objects in limited space and time, without ability to lay out and weight a water based adhesive with a water soluble artwork. A paper support was preferred to reduce the differentiation in dimensional change or moisture uptake between the artwork and the support.
Q: Was actual Velcro(TM) used or generic hook and loop tape?
A: “We used generic hook and loop tape from Eastex Products. They were able to provide the custom sized pieces in the timeline we needed.”
Category: AIC’s Annual Meeting
Provides the membership with updated news about the annual meeting. Also announces themes, deadlines for papers, need for volunteers, etc.
44th Annual Meeting- Electronic Media Session- Recovering the Eyebeam Collection following Superstorm Sandy- by Karen Van Malssen
This presentation highlighted the risks to important collections that are located outside of traditional museum or library environments. Eyebeam, a non-profit multimedia art space was among the buildings inundated by flood waters in Manhattan’s West Chelsea neighborhood during Superstorm Sandy. Eyebeam is a collaborative workspace, rather than a museum with a “permanent collection,” but like many alternative arts spaces and contemporary art galleries with no “permanent collection,” Eyebeam maintains a collection of work created by former fellowship recipients (something that looks a lot like a permanent collection).
Just as many people in on the East Coast attempted to prepare for the storm, the art center’s staff had had underestimated the magnitude of Sandy’s storm surge, since the storm had been downgraded from the lowest level of hurricane strength on the Saffir-Simpson Scale. The staff members had worked diligently to raise equipment off of the floors and to cover furniture and equipment with plastic sheeting. Unfortunately, three feet of water flooded the interior of the building, causing the loss of 1,500 media items and $250,000 worth of equipment. The presenter showed a video demonstrating the extent of damage to the media archive, contaminated with foul, polluted, flood water. Recovery primarily involved rinsing in clean water, but recovery required more than just the treatment process.
The presenter provided a convenient, numbered list of lessons learned:
Lesson 1. Know Your Context: Assess known risks and anticipate the worst-case scenario. Eyebeam was located near the water, but the staff members had not anticipated catastrophic damage affecting the entire region.
Lesson 2. Maintain Contacts with Local Responders: Assembling a network of contacts in advance of the disaster will greatly improve response time; plan a well-designed scalable system for working with responders
Lesson 3. Train ALL Staff for Recovery: You never know who will be available in an emergency; Be prepared to break all procedures into simple steps for training. The two biggest risks during recovery were dissociation (separation of related parts or separation of labels and other identifying markings) and mishandling (outside expertise in video preservation may be scarce).
Lesson 4. Label Everything: This makes it possible to reunite parts that were separated during recovery.
Lesson 5. Make Hard Decisions in Advance: Maintain records of collection salvage priorities, so resources will not be wasted on low-value materials.
Lesson 6. Know What Roles You Will Need: Do not allow people to multi-task; each person needs a clearly defined scope of responsibility.
Lesson 7. Keep Critical Supplies on Hand: Regional disasters cause shortages of supplies that might be plentiful at retail under normal circumstances.
Lesson 8. Adrenaline Wears off: Schedule breaks from work, and assign someone to provide food, water, etc.
Lesson 9. Integrate Preparedness into Institutional Culture
Lesson 10. Strive to Avoid Negative Press: Many anonymous critics on social media complained that Eyebeam should not have maintained an archive of analog videos or hard copies of digital content, that all of the content should have been duplicated on some cloud server not affected by the storm.
Since the disaster recovery, Eyebeam has relocated to Brooklyn.
44th Annual Meeting – Workshop, May 14, "Gellan Gum Applications for Paper-based Objects"
I was very excited to see Gellan Gum Applications for Paper-based Objects listed on the workshops for AIC/CAC, but I was also a little worried about signing up. My familiarity with gums in paper conservation was limited to reading the odd DistList posting. Would it be too technical? Would I be in over my head?

I shouldn’t have worried. The facilitators from Library and Archives Canada and the Canadian Conservation Institute put me at easy immediately, and the group introductions reassured me I wasn’t the only novice in the group.
We began the morning with a presentation covering both a theoretical and practical introduction to gellan gum. Crystal Maitland did an excellent job of explaining the science behind the use of gellan gum without overwhelming us with too much technical detail. After the getting the theoretical grounding Doris St-Jacques, Greg Hill and Anne Maheux took over and shared some of the practical treatments which had been performed at CCI and LAC.
From there we headed down to the Canadian Centre for Architecture’s inviting lab. It’s always exciting to visit another institution “behind the scenes” and CCA’s facilities did not disappoint. Despite the large group everyone had their own workspace prepared for them with all the tools and samples we’d need for the day.
One of the real strengths of the workshop was exactly how much hands-on experience we gained. We split in to two groups to watch Doris and Greg prepare batches of gellan gum and then in to groups of three to give it a try ourselves. The process proved to be fairly simple, especially with the help of the excellent workshop leaflet. It included clear instructions and my favourite kind of diagram – one which does all the ratio math for me! In addition to the recipes the leaflet also included figures outlining the order of layers for different kinds of gellan gum cleaning and instructions for bleaching and deacidification. All together a very useful document.


Every participant was provided with a print which had been cut in to four sections for testing cleaning, deacidifying and bleaching. Many participants also brought their own samples. This was an excellent bonus, allowing everyone to see the effects on a wide variety of materials.

Each group began by mixing up their own batch of gellan gum. These set by the end of the day, allowing us to test our handy work, but the facilitators had also prepared a large number of sheets of with a variety of concentrations and additives. It was very informative to be able to play around with the assortment. Very few institutions have to resources to create such a wide variety of gels just to allow their conservators to gain the experience of the different properties, making this an invaluable experience
.
The gellan gum workshop accomplished something I was sure was possible at the start of the day. It allowed me to leave feeling confident enough in my skills that I’m looking forward to trying out gellan gum in my own lab. And if turning an intimidated rookie in to a confident tester isn’t the sign of a great workshop then I don’t know what is!

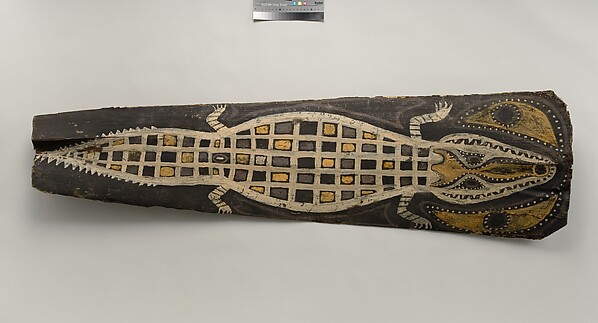
44th Annual Meeting – Research and Technical Studies, May 17, "Binders and pigments used in traditional Aboriginal bark paintings” by Narayan Khandekar
This was the last talk I saw at the meeting and was a perfect way to wrap things up, with a travelogue-slash-fascinating research project on the materials and techniques of Aboriginal paintings from the northern part of Australia. Narayan traveled to various art centers and museums to look at and sample pre-1960s paintings, talk to artists and gather local materials. He took about 200 samples from 50 paintings (including some from Harvard’s collection), the oldest from circa 1878. He also obtained materials from artists working today, some of whom took him around to gather materials from local sources, including the beaches of Bathurst Island (part of the Tiwi Islands off the coast of the Northern Territories – thanks Google Maps!). Back at Harvard, he and his colleagues (co authors were Katherine Eremin, Daniel P. Kirby & Georgina Rayner) gathered information on pigments, binders and other materials present that may indicate previous treatments. Narayan pointed out that only two samples of similar paintings had been analyzed and published before, such that this study presents entirely new information.

Of particular interest was the investigation into possible binders. Oral histories and documentary evidence recorded various possible binders, including turtle eggs and orchid mucilage, but it was generally thought that paintings made before the arrival of missionaries in the 1920s didn’t have binders at all (a similar question has been on my mind regarding the paintings made in the Sepik River region of Papua New Guinea). Binders were present in 77% of the samples analyzed. No proteins, waxes, fats or blood were detected. The analysis of the oldest paintings did reveal the presence of orchid juice, confirming that binders were in use that early. The techniques of using orchid mucilage could vary; the sticky juice could be mixed with the pigment, or laid down first before applying the pigments mixed in water.
As expected the pigments were largely ochres, and Narayan noted that the trace elements present in the samples provide a fingerprint that can in theory be used to begin to trace the occurrence of different ochres in different areas, but that more study and sampling is necessary to pursue this.

Other interesting findings included the use of dry cell batteries as a source for black manganese and zinc pigments on paintings from Groote Eylandt (yes a very great big island off the east coast of the Northern Territories); this area also shows the use of natural manganese-rich ores and charcoal for black pigments. A curious silver oil-resin paint on two paintings from the 1920s turned out to correlate with the roof repainting of a nearby lighthouse at the same time. The presence of DMP (dimethyl phthalate) in some paintings prior to 1957 resulted from the liberal use of insect repellent (FYI this is the main ingredient in Avon’s Skin-so-Soft; it fell out of use when DEET was invented). The presence of nitrocellulose on Groote Eylandt paintings was connected to records from the 1948 expedition suggesting that they had been consolidated with Duco.
As always, research continues, and Narayan mentioned that they would be looking further into the use of gums and of bloodwood, though I didn’t get down any details on that (I hadn’t actually planned to blog the talk, so apologies for any lacunae!). Also, I’m pretty sure there was a crocodile sighting mentioned, but that too didn’t make it into my notes, so here’s one of my favorites for good measure…
44th Annual Meeting & 42nd Annual Conference—General Session, 15 May 2016: "Visions of Disaster: Bringing the Blur into Focus," by Polly Christie and Sarah MacKinnon
Polly Christie and Sarah MacKinnon took us through the history of the 2014 Glasgow School of Art fire, beginning with how the building’s construction directly affected the scope of the disaster, taking us through the extent of the damage, and detailing the ongoing rescue process. Each component of this complex recovery project intersects with the others, demonstrating the interconnected nature of cultural heritage properties and the collections residing within.
Designed by Charles Rennie Mackintosh and built in phases, the Glasgow School of Art building is widely considered Mackintosh’s masterpiece, and is an early example of both total architecture and industrial design. The first phase, completed in 1899, saw the completion of the east wing, while the second phase, modified from the original plan, included the west wing and additions to the east wing, and showcases Mackintosh’s work at the height of his powers. The library tower, located in the west wing, borrows elements from Japanese architecture and was built to best accommodate the needs of the school. In addition, Mackintosh’s work includes an early air conditioning system of branched ventilation ducts running in straight lines through the entirety of the building.
These ventilation ducts, while certainly appreciated by the building’s occupants, were critically involved in the 2014 disaster. The blaze began in a basement studio and spread quickly throughout the building via the ducts, reaching the library tower and raging through the collections stored both in the stacks and in storage above the main library space. These collections were irreplaceable, including school archives, art created by alumni, historic furniture, and 11,000 special collections volumes.
The fire required 11 teams of firefighters and 24 hours to fight. Once the danger had passed, the mass of destroyed building and collections in the library tower was “excavated” or sorted through in one-meter-square areas, leading to the salvage of 81 volumes as well as important information about the underlying structure that would be used in the reconstruction effort. Triage systems and decision trees were established for sorting through the wreckage and recovering collections items.
A few collections merited particular mention in light of the recovery efforts. A large textile collection held in storage survived, but the packaging was destroyed; this was not covered by insurance claims, as the staff learned, and the collection is currently inaccessible while a new housing is designed and made. The school also has a substantial collection of plaster casts of famous sculpture, including three copies of the Venus de Milo. Insurance funds were diverted to treatment of certain casts, leaving the remainder to the care of volunteers, and one of the burnt Venuses was deemed not worth the effort. However, the blackened cast has captured the media’s imagination and public support for its treatment is high. In addition, the library was furnished with brass light fixtures, which became an intersection of the building fabric and the collections; many were dissociated in the disaster, and salvaged pieces will be reunited when possible. The school archives provided the original sketches of the lamps’ design and construction, and these will be used to restore the lights to functionality.
Lessons learned? Perhaps one of the biggest takeaways is that archival collections and other records can be valuable resources in recovering from a disaster. The better the records of a heritage building and its collections, the better the disaster response will be. Knowing the extent of one’s insurance cover is also important, as the Glasgow School of Art learned with regard to the textile collections. And as Christie and MacKinnon demonstrated with their remarks, in cultural heritage disaster response, everything is connected—from the fabric of the building to the collections housed within. In the end, Christie and MacKinnon advised attendees that choices made in disaster response will always be limited by the circumstances of the disaster; the best decisions to make are the best decisions you can make.
44th Annual Meeting – Collection Care Session, May 15, "Spoiler alert! Planning around the pitfalls of construction projects" by Jeffrey Hirsch and Angela Matchica
Construction projects have been on my mind lately and I thought this would be a good complement to Angela Chang’s presentation about her experiences during two major construction projects at the Straus Center (she spoke at the Conservation & Exhibition Planning: Material Testing for Design, Display, and Packing conference in DC in November 2015). Jeffrey Hirsch and Angela Matchica from Ewing Cole (an architect-design-engineering-planning firm) put together a clear and useful review of how conservators and collections care professionals can be active participants in a construction planning process. They took turns speaking, with Jeffrey giving an overview of each issue or area of collaboration, and Angela providing the in-practice examples from her experience as a lighting designer. The concrete examples were helpful in illuminating how collaboration goals can be translated into actual practice and decision making.
Jeffrey emphasized the complexity of the team on both sides of a museum construction project, with a wide variety of interests being represented. He noted that while those from Facilities departments are probably used to talking to architects and designers, the rest of the museum representatives may not initially be as comfortable, but need to make the time to stay at the table and speak up whenever they have questions. The slide below started out as just two dots – Design Team and Museum – and then grew and grew to encompass all the different roles that are part of the discussions around planning a new space or changes to an existing space.

In this diverse group, achieving consensus can be difficult, and knowing everyone’s individual needs is important. Angela discussed one instance in which repaired dinosaur skeletons were going on view, and light levels were initially assessed for the bones themselves, though it turned out that the most sensitive material present was the adhesive in the repairs. She also mentioned that they built a standalone mockup so that lighting levels could be experienced by all stakeholders, to get a real sense of what the space would feel like with different lighting, to achieve consensus. I thought this slide was helpful in illustrating all the sub-questions from different stakeholders that are a part of one major design decision.

Jeffrey noted that what looks like one construction project is really a number of simultaneous and interdependent projects – structural, exhibit design, conservation, and so on – all coming out of basically one pot of money. Scheduling all of this was likened to a symphony, in which it’s very difficult to get the multiple instruments to finish the piece at the same time.

As always, communication was underscored as the most essential element. Each group should be aware of how the other groups are progressing, and know if someone’s end date is shifting, and what that means for all the others. On this point, he stressed how important it was to have a contingency amount of funds specified in the budget very early on. Changes cost a lot more at the end then they do at the beginning, so it’s also important to assess all your options early on and make choices then, with full information about the long-term costs of each option. Here, Angela presented the choices between various types of light bulbs, some of which are low cost but require frequent replacement, while spending a bit more at the beginning can lead to major savings in time and materials later in the life of the building – value engineering.

The end message for all involved parties was to stay at the table, attend all meetings, read and familiarize yourself with all the minutes and notes, and keep track of what decisions are made. No sweat! I still feel like the only way to really know how to predict and prepare for all the things that can go wrong in a construction project is to go through one and learn from your own mistakes – but it was great to hear from the other side of the table, especially from a team that has a real sense of the wide-ranging and diverse concerns of working in a museum setting and the energy to work towards collaboration.
44th Annual Meeting, Paintings Session, May 17, 2016, “Experimental study on merits of virtual cleaning of paintings with aged varnish” by Giorgio Trumpy and John K. Delaney
Giorgio Trumpy presented interesting work he has been conducting on the “virtual cleaning” of paintings at the National Gallery, Washington, D.C. as a post-doc with John Delaney. He described a mathematical/- computer model which is being developed to predict and represent what a painting would look like after the removal of a yellowed varnish. The idea is not to replace the conservator, but to provide a tool in helping conservators visualize the results of such a treatment.

The model makes use of the contribution of the scattering (diffuse reflectance) of light from the surface of a painting with and without an aged varnished, after application of a fresh varnish, and from the interface of the paint layer and the varnish surface itself. Measurements were made on two paintings to obtain values for use in the model, and the optics of the yellowed varnish itself was estimated by measuring the transmittance through a solvent containing the dissolved yellow varnish.
The results give a pretty good indication of what the painting might look like after removal of the vanish. Click on the image* to see the animated .gif (it worked on my computer). There are differences with the paintings however as can be seen comparing the virtual cleaning image and the after (real) cleaning image. Trumpy thinks that the differences are due, among others, to the fact that the model does not account for local variations in varnish thickness or aging, and the use of the transmittance values for the yellow varnish as measured through the solvent.
In a follow-up e-mail van John Delaney I understood that the goal of the work is to better understand which factors are important for this kind of modelling work, and also to determine the limits of what the model can do. Still, I found it fascinating to see how far they had gotten.
______________________
* Image courtesy of G. Trumpy and J. Delaney, Scientific Research Department, National Gallery of Art, Washington, D.C.; detail from “Flowers in an Urn” by Jan van Huysum, c. 1720/1722, oil on panel,
79.9 x 60 cm.
44th Annual Meeting – Saving and Preserving Family and Local History from Natural Disasters: Addressing Challenges from the Recent Earthquakes in Japan
This panel, presenting on the response to the tsunami in Japan in 2011, was composed of Masashi Amano, Kazuko Hioki, Tomoko Yasuda Ishimaru and Daishi Yoshihara. Drs. Amano and Yoshihara are both historians, and Ms. Yasuda is a conservator in private practice in Tokyo. Ms. Hioki is a conservator in the United States, and special thanks goes to her for her excellent translation during the question and answer sessions.
The presentations brought to light a number of interesting cultural differences that may be surprising to an audience from North America. The majority of public records (according to Dr. Yoshihara, the number may be as much as 90%) are held privately, rather than my public or governmental institution. This means that when a disaster occurs, it is often difficult to find out who is a stakeholder, what records are involved, or even where those records are. Often, historic sites contain records, but just as often records, historical and modern, can be found in attics and in community centers. This would include tax information, birth and death records and legal documents.
The prevalence of natural disasters in Japan makes creates another important difference.it It si very difficult for insurance companies, a very conservative business in Japan, to provide coverage in the event of a natural disaster. This means that public institutions and private collections cannot rely on the insurance industry to pay for recovery companies, and as a result, recovery companies have a much reduced presence in Japan. The end result is that, when natural disasters occur, Japanese individuals and institutions cannot rely on the same emergency response structure that we in North America.
The presenters spoke about their work helping disaster recovery after the 2011 tsunami, but much of their presentations focused on Shiryo-net (the Miyagi chapter which responded to the tsunami has an english language blog). Shiryo-net is a grassroots organization of historians and volunteers who respond to disasters specifically to deal with conservation issues, such as finding out where in a town records may be kept, rescuing those records, and performing triage treatment whenever possible. Shiryo-net formed after the Hanshin-Awaji earthquake in 1995, and has grown to 24 regional chapters across Japan.
Since its inception, Shiryo-net has focused on saving those 90% of documents that are not in museums, libraries and archives. Its activities are entirely funded by membership dues and donations. The organization first came into contact with conservation on a more formal basis in the wake of a flood in Hyogo prefecture in 2004. During this disaster, they were able to work with conservators to develop first aid treatments that could be taught easily to volunteers, and the difficulties they encountered encouraged them to host workshops and become a center of volunteer training for conservation volunteers. When another flood occurred in Hyogo in 2009, the response was much quicker, and the level of care given to documents was much better. Shiryo-net is now an experienced organization, and focuses on leadership training and volunteer education as well as disaster response.
The second major focus of the talks given by the presenters was on Shiryo-net’s response to the 2011 earthquake and Tsunami. The obvious difficulties of working in a disaster area were present, as were the difficulties of working with a large, non-professional force. Over the course of the recovery, Shiryo-net worked with over 5,000 volunteers, and had to develop techniques for training, supplying and managing such a large and ever-changing population. Because of the scale and scope of the disaster, salvage operations were ongoing as much as three years after the disaster. Since the tsunami, Shiryo-net has rescued more 70,000 items, with at least 50,00 items still in storage waiting to be treated.
The presentation was informative and engaging. It was interesting to hear about the different challenges faced in a different country, and how those challenges have been met or overcome. I would like to thank the presenters again for being so forthcoming with their talk materials as I prepared this post.
44th Annual Meeting – Photographic Materials Session, May 15, “Analysis of Historical Tintype Plates: Materials, Methods and Manufacturers” by Dr. Corina Rogge
Dr. Corina Rogge, the Andrew W. Mellon Research Scientist at the Museum of Fine Arts, Houston, presented a very interesting (and thorough) talk on the “Analysis of Historical Tintype Plates: Materials, Methods and Manufacturers” giving a brief overview of the tintype process and the ongoing project to characterize their material properties. The analysis was undertaken on a study collection involving 226 unknown tintypes.
Despite the popularity of the process, there were only three patents filed in its history, and how they were actually made is poorly known. Hamilton Lamphere Smith and Peter Neff first patented their process for a collodion image on a japanned surface in 1856. Their melainotypes, so named from the Greek melano, or black, consisted of a varnished image layer on the japanned iron plate, also varnished verso. Peter Neff was interested in the commercial properties, including japanning purchased plates. He sold prepared plates, as well as licensing the process for use. The plate itself was not patented. Victor M. Griswold patented a competitive process also in 1856, using bitumen on an iron plate, and called them ferrotypes to indicate the iron content. There were eventually several plate manufacturers including Neff, Griswold, Dean & Co., and Phenix; however, only Neff and Griswold stamped their plates.
Tintypes were affordable, durable and accessible, and became widely popular in mid-1800s America, and really came to represent the middle class. They are not as common in museum collections, but a large number survive as family and historical items. Dr. Rogge noted that the market and development of the process were strongly economically driven, and the producers found a need to create trends to keep their edge or drive sales. For example, Griswold began to name and sell imperfect plates as “eggshell,” in addition to glossy plates.
Dr. Rogge’s study sought to determine whether different manufacturers used different materials, and if so, whether they be differentiated and dated. X-ray fluorescence spectroscopy (XRF) analysis revealed mostly iron, as would be expected for the plate. A smaller number contained manganese, but didn’t seem to correspond to a trend. There were no major differences in thickness, aside from very early Neff plates being thicker. These very were fairly quickly thinned down to the typical size, making them cheaper to manufacture and mail. Griswold used thicker plates only very briefly.
Organic analysis was carried out on the japanning layer by pyrolysis gas-chromatography (py-GC-MS). There were no particularly unusual result, as might be expected for a commercial process. Drying oil was the most common component, then pine resin, followed by a small number containing shellac. Asphaltum, which Dr. Rogge pointed out is difficult to work with, was found in fewer than 10% of the plates although it is mentioned in two of the three patents ever filed.
Microscopy determined the most common pigments of the japanning layer to be carbonaceous blacks, as given in the Neff patent, and iron earth pigments as given in the later patent. Plates were sometimes advertised as chocolate or black, and an effort was made to differentiate between the two. Colorimetric analysis ignored the CIE b* parameter (blue-yellow) to accommodate the assumed yellowing of the varnish. CIE a* when checked against manganese didn’t correlate. In attempting to differentiate the bare support versus japanning layer with support, the thickness of the japanning layer seemed to have much more influence. However, Dr. Rogge believes further study may prove chocolate plates (more red) correlate to the use of iron earth pigments in the japanning layer.
Relatively few plates had a single japanning layer, while many had two or three. Though the practice is not indicated in any of the patents, it is mentioned in articles of the time on how to make tintypes. Though multiple coats would increase the cost and difficulty of production, they would provide a smoother, glossier surface. In addition, a more pigmented bottom layer (a ‘face coat’) might serve to isolate and protect pigments from reactive image silver, and approximate the depth of an ambrotype by allowing more light to pass through.
Dr. Rogge pointed out that the project needs more data but points to the possibilities of trends and potentials for identification. She noted also that the actual plates varied significantly over time, and differed between manufacturers and particularly from the patented processes. For example, Neff plates may have more layers as time goes on, and Griswold plates may be associated with profiles containing asphaltum, drying oil, pine oil and shellac. Such an ability to profile the plates would give the possibility of identifying and dating unknown plates.
44th Annual Meeting, Photographic Materials Session, May 17, 2016, "Methods for Cleaning Brass Mats from Cased Photographs" by Christophe Vischi, Ariane Lalande, John McElhone and Chloé Lucas
Christophe Vischi and Ariane Lalande presented a talk on practical tests they conducted to determine how to clean brass mats of photographs from the collection of the Colby Curtis Museum, Stanstead, Quebec. These mats suffered from multiple corroded spots (which I know as pitting corrosion from industry), containing stable Cu2O cuprite and active atacamite Cu2Cl(OH)3. They compared two electrochemical methods and the use of an ion exchange resin to treat the mats:
– spot electrolysis using an EDTA electrolyte and at 9 Volts,
– brushing an glycerine electrolyte on the object, wrapping it in aluminum foil and laying it a humid chamber
– use of the ion exchange resin, Amberlite IR 120 HM. This comes in the form of beads, which were applied locally on the object as a poultice using a fine brush.
The authors did not obtain good results with the electrochemical methods, with staining being a problem for the spot electrolysis, and a gray patina a result of the wrapping method. They chose the method using the ion exchange resin. It was found that grinding the beads before application improved the results. Very local cleaning was possible, and the solution could be rinsed off with a mixture of ethanol and water. Still, there were flecks left where the pitting corrosion was, but these could be retouched to match the finish. Care had to be taken to avoid staining uncorroded areas. The result appeared to be satisfactory, and they want to continue work on optimizing this method.
I would like to note that electrochemical methods should not be ruled out based on this paper. When performed properly, electrochemical cleaning can be used to clean most metals found in museums. C. Degrigny, among others, has demonstrated that local electrochemical cleaning can work under properly controlled conditions (cathodic potential/voltage), using the proper equipment, and electrolytes. The aluminum foil method might have worked if the objects were not wrapped (traps the reaction products), and the proper electrolyte was used. If I heard correctly, glycerin was used as the electrolyte, but it is non-conducting, so it could not have worked.