
In a presentation related to the Disaster theme of the conference, speakers Colford and Christie spoke of the recovery of flood damaged photographic collections of the Peterboro Municipal Archives, in Ontario in 2004. The area wide disaster created such demands on affected infrastructure that the response began two weeks after the peak flood, which led to a decision to freeze all the of works, including glass plates and film negatives as other methods of drying had not been possible. The PMA participated in a CCI risk assessment which reported back with recommendations to keep all film stabilized in freezers for continued cold storage, and to identify cellulose acetate negatives as a specific priority for treatment due to their autocatalytic behavior, leading to eventual change and loss of values.
The authors, looking to Pavelka & Naipavel-Heidushke’s paper on successful treatment and separation of gelatin image layer from acetate support, called out Pavelka’s suggestion that insurance companies might provide financial assistance for treatment in their coverage. Following the protocol suggested in the article, the authors proceeded and achieved inconsistent results. They noted the process per negative could take up to ninety minutes, resulting in only four negatives treated over two days, They cited concerns of prolonged exposure of the negative to solvents, yet found it hard to keep solvent from evaporating, which could induce curl and tensions while drying. A new question developed, what was the difference between the article’s case studies vs. theirs? An obvious variable was the fact that these items had been frozen. Whether or not this actually factored into the negatives’ behavior. Consulting further with Greg Hill (currently of the Canadian Conservation Institute) & Gayle McIntyre (Sir Sandford Fleming College), the protocol was revised to include the following steps, which helped increase the reliability of the method across different negatives:

1. Remove material by cutting away some of the lip/edge of the negative to allow ingress of solvent
2. Prewet the negative using sequential solvents
3. Use visual and tactile clues to determine the moment of separation (need slide 3.1, 3.2.) not a fixed amount of time
4. If the gelatin is still disrupted, reshape while it is still wetted using gentle prodding (with brushes on silicon release Mylar*) to lay flat before drying completely. The unsupported pellicle, thin as tissue, can be left to release final residues of solvent in a non-stick drying pack in fume hood to offgas.
(More images of these steps available in the downloadable Kiss Your Acetate Goodbye images of layer separation, pdf file kindly provided by the speakers.)
The images, now supported on Mylar sheets, were digitized, and the storage solution after treatment includes use of polypropylene sleeves in a clamshell binder. In an added benefit, the items are no longer taking up space in cold storage. The authors report that after eight years, the images appear unchanged in these conditions. While having a positive outcome, the speakers note that is still a lengthy process involving time and material costs, requiring trained professionals. This technique may not be a catchall for all collections, but for prioritized ones, it can be effective management tool for severely decaying negatives.
*Additional note: Silicon tip tools may also be useful here. See related content from 2016 BPG Tips Session on Silicon Shapers, as found in art supply stores today among the brush selections for working thick paints, in the BPG wiki.
Category: Specialties
BROMEC 36, the Bulletin of Research on Metal Conservation, is now available

BROMEC 36, the Bulletin of Research on Metal Conservation is now available online at the following websites:
- http://www.warwick.ac.uk/bromec
- https://groups.yahoo.com/neo/groups/Metals-Conservation-Discussion-Group/files
- http://www.icom-cc.org/10/documents?catId=13&subId=127
Seven research abstracts and 2 announcements are presented, together with the usual lists of related contacts and informative metal research/conservation websites and discussion groups.
You will find English, French and Spanish language versions for downloading as PDF documents.
To subscribe for email updates about BROMEC: http://www.warwick.ac.uk/bromec-subscription
As a reader, or potential contributor, we trust you will find this issue informative and useful.
BROMEC Editorial Team
Anglophone Editor & Translator:
· James Crawford
Francophone Coeditor:
· Michel Bouchard
Hispanophone Coeditor:
· Diana Lafuente
Francophone Translators:
· Nathalie Richard
· Elodie Guilminot
Hispanophone Translators:
· Ana Cresp
· Ana Pastor
44th Annual Meeting-Textiles Session, May 15, “Exploring Origins and Power: The technical analysis of two Yoruba masquerade costumes by Rebecca Summerour”
Rebecca Summerour presented on-going technical analysis of two mid-twentieth century Southw estern Nigeria Yoruba egungun masquerade ensembles from the collection of the Smithsonian National Museum of African Art (NMAA). Her co-author and supervisor is Dana Moffett, Object conservator at the NMAA. We were introduced to egunguns with images of these multi-layered assemblages as they are worn in ceremony, and mounted for displayed. Egungun invoke honor, and embody lineage ancestors during yearly festivals. Rebecca is working not only to analyze the varied materials used in their fabrication; she also is investigating their cultural context and the values placed on textiles in Yoruba culture through consultations with Yoruba scholars. She explored the origins of the materials used, and their importance as elements of the whole. These egunguns were collected with minimal provenience. (Image from Smithsonian National Museum of African Art, africa.si.edu)
Egunguns consist of multiple layers of colorful, mostly commercial, pieced fabric lappets with serrated edges over a wooden support that “swirl when danced.” Egunguns represent individual or collective ancestors. The ensembles are not made for a specific dancer. They are worn for generations and are repaired before each use. During repairs materials may be added or removed, making it difficult to pinpoint a date. Some of the components are pre-assembled by market tailors and later incorporated into the assemblage and sanctified. A striped fabric (knotted or crochet) sits at center, obscuring the face of the wearer, but allows him to see. The egungun interiors are lined with handwoven oke, a highly valued prestige fabric. Oke is also used for burial shrouds, which Rebecca pointed out is a symbolic link to the ancestors who are invoked during performances in the egungun. The color red is used extensively to divert evil. Rebecca identified highly valued velvets, needle point, ecclesiastical textiles, Europe satins and cotton prints made expressly for the African market, and Adeara Uraba, a Yoruba indigo cloth that is tie dyed or patterned with a starch resist. Also present were metal pin back political buttons.
Rebecca has examined over 600 different textiles, many of them are African wax (or fancy prints) designed in Europe and produced in Manchester England and Holland to imitate late nineteenth century Indonesian batiks. After decolonization similar prints were manufactured in Africa and East Asia. Rebecca contacted the Manchester School of Art ABC Archive, which has many examples of these fabrics. Initially this gave her great hope of tracing some of the manufacturers of the prints and locking in dates of manufacture, but she was informed that only by chance would one find a match. The prints are too similar to easily identify. She mentioned it as an opportunity for her future study.
Technical analysis included X-radiography, X-ray fluorescence, Raman spectrometry, Fourier transform infrared spectroscopy, and polarized light microscopy, of the various materials present such as wood, cotton, rayon, pitch, adhesives, metal, elastomeric films, PVC and other plastics.
Rebecca has future research trips planned for this summer and will see eleven other engunguns. She is working to identify the materials in these egungun to construct a time line of what materials were available in Nigeria in the twentieth century. She feels that the whole story will never be know as there are limits to the amount of research that can be carried out, and mid twentieth century fabric trade was complex. The goals of her study are to contribute to the overall “biographies” of these objects, inform future plans for the costumes long-term care, and expand on the available published studies.
Job Posting: Objects Conservator – National Museum of African Art (Washington, DC)
Objects Conservator
The Smithsonian’s National Museum of African Art is the only facility in the United States dedicated exclusively to the treatment and preservation of Africa’s traditional and contemporary arts. With the generous support of the Andrew W. Mellon Foundation, the Museum is pleased to offer to an emerging professional the opportunity for a full-time, 2-year term position working with museum conservation staff on all aspects of collections care. Beginning in early fall 2016, the position is part of an initiative designed to promote conservation training, diversity in the profession, and African art scholarship. The successful candidate will actively participate in all aspects of practical conservation including: examination, documentation and treatment of a range of inorganic and organic materials, both traditional and contemporary; preventive conservation activities such as monitoring the environment, maintenance of micro-environments, and materials testing; assisting in exhibit installations and deinstallations; participating in lab research projects; and the mentoring of undergraduate ‘explorer’ interns, pre-program interns and post-graduate fellows.
The successful candidate will:
*Hold a graduate degree in conservation from a recognized training program
*Have 1-3 years of post-graduate experience
*Have demonstrable interest in ethnographic objects
Salary: $53,500/year plus health and commuter benefits.
How to apply:
Please send a letter of intent, resume and names of two references to:
Dana Moffett, Senior Conservator: moffettd@si.edu
Closing date: August 8, 2016
44th Annual Meeting: Architecture and Objects Joint Session, Sunday 15 May 2016, "A Methodology for Documenting Preservation Issues Affecting Cultural Heritage in Syria and Iraq" by LeeAnn Barnes Gordon

Providing assistance in war-torn areas in Syria and Iraq is a complicated matter. The humanitarian crisis has resulted in protests in Syria against the government while a civil war led to the emergence of extremists groups, the most active threat being daesh (ISIS/ISIL). Collateral damage to the area has resulted in the militarization of archaeological sites and historic neighborhoods being obliterated. Organizations such as the ASOR Cultural Heritage Initiatives (CHI) are continually working on meeting the challenges of this cultural heritage crisis. Through diligent monitoring, CSI is able to assist the nations by documenting damage, promoting global awareness, and planning emergency and post-war responses.

LeaAnn Barnes Gordon gave an insightful presentation into the complications of providing international support to local residents and institutions. A highlight of Gordon’s presentation was showcasing CHI’s extensive digital mapping of over 7,800 cultural heritage sites. These maps help to assess the affects on cultural heritage by analyzing different types of damage as well as current and prospective threats. By utilizing satellite imagery, CHI can monitor changes over time in areas that have been damaged by military occupation or that have been illegally excavated. Information is compiled into reports using photographs and textual records of observations; some of these records are currently available online and others are being added regularly.

CHI is standardizing documents and terminology to avoid ambiguity during documentation (e.g. threats vs. disturbances). In the presentation, Gordon provided examples of types of documents utilized including field guide assessment forms, photo-documentation guides, and technical advice in Arabic to assist those currently living/working in Syria and Iraq. In addition, CHI is providing resources and funding for local institutions for efforts such as cleaning and removing debris and erecting temporary structures.

The presentation discussed ongoing CHI projects as well as general challenges faced when attempting to protect cultural heritage in conflict zones. Constant monitoring allows CHI to identify potential damages and share this information with conservation/preservation specialists in the area. These measures help prevent and decrease future damage to culturally rich sites and collections as well as helping to create standardized documents that can be used in other areas of conflict zones. 
To learn more about CHI and the important work they are doing, please see:
http://www.asor-syrianheritage.org/
44th Annual Meeting – Textile Session, May 15, “Inherent Vice in the Woven Structure of Northwest Coast Spruce Root Hats” by Sara Serban

We all love the topic of inherent vice. And in this talk, the topic is presented as it relates to basketry, hats, and an exhibition at a museum of Canadian social history.
Sara Serban, Objects Conservator at the Musée McCord in Montreal, spoke about painted and woven spruce root hats she prepared for “Wearing our Identity: The First Peoples Collection,” a ‘permanent’ exhibition planned to last five years (with rotations). The five hats selected for display were made between 1850 and 1920 by weavers from the Northwest coast of Canada, including the Haida and Kwakwaka’wakw cultural groups. In her talk, Sara discussed how the hats’ materials, complex woven structure, past storage and environmental conditions, and previous treatments relate to current condition issues and present treatment challenges.
Sara consulted with Isabel Rorick, a talented Haida weaver (see some of her work here), in order gain a better understanding of the materials and techniques used to make these types of hats. Sitka spruce roots are used for weaving because they grow in long straight lines. Roots are usually 3 to 20 feet in length, but can be as long as 50 feet. After harvesting, the outer layer of bark is removed from the roots by heating with hot coals, causing the bark to peel, and then pulling the roots through a split stick. The root is then split lengthwise one or more times. The interior pithy core is discarded, the inner layer is used for the warp of the hat, and the outer polished layer is used for the weft.
The processed roots are soaked in water and then woven from the top down using a combination of two-and three-strand twining techniques. Three-strand twining is almost always used for added strength at the crown of the hat, and twill twining is used to create geometric patterns at the brim. Continuous warps are used in the beginning, with additional warps added in as needed. A wooden disk form can aid in shaping the hat during weaving. An awl is often used to push the stitches together, and when complete, the hats are watertight.
Sara reviewed condition issues and previous treatments of the hats chosen for exhibition. As can be expected, the older hats are more fragile, and they all have experienced deterioration from low humidity. Darkening of spruce root, from cream-colored to dark brown, as a result of oxidation is a condition issue I was not aware of and seeing this contrast surprised me (compare the historic hat in the image above with the light color of this contemporary spruce root hat made by Rorick). Sara pointed out that while woven spruce root baskets are stored resting on their bottoms, hats are usually stored resting on their brims, and this positioning may cause additional stresses within the hat structure over time. She also noticed that certain areas, like the top disc, top edge (or turn), and crown, are more susceptible to breakage.
The majority of hats had undergone previous treatments (sometimes multiple campaigns), and many of these interventions caused further damage to the root fibers. For example, one hat had been repaired with a thick, raffia-like fiber that caused overall distortions in shape and breakage of adjacent root fibers. Sara questioned whether this type of mending was a traditional repair carried out when the hat was in its source community, or if it was later work. After a survey of spruce root hats in the museum’s collection, she found many had similar repairs, and because of this consistency, the repairs were likely carried out in the museum.
The museum’s conservation records indicate that treatments using methyl cellulose, wheat starch paste, and mixtures of Lascaux 360 HV and 498 HV were carried out in the 1980’s. Additionally, Paraloid B-72 in acetone was previously used to repair at least one hat because wheat starch paste was not found to be strong enough, although it was noted that acetone did affect the black paint on the surface. The common basketry repair technique using twists of Japanese tissue coated in adhesive was found not to be reliable, as these repairs often failed (e.g. the tissue lifted) not long after they were applied.
Examination of these past treatments helped Sara plan her treatment approach. Since the hats did not respond well to the adhesive mends of the past, she created mechanical mends using hair silk to hold the sides of the breaks together. She used a pattern of stitching with horizontal stitches on the outside of the hat and vertical stitches bridging the split on the interior. Prior to mending, she humidified distorted hats in a chamber with water and ethanol and then reshaped the hats, with the aid of carbon rod clamps (one of my favorite conservation tools). Tinted Japanese tissue, with twists to imitate weft strands, was used to fill losses on the hat’s crown. For loss compensation at the top turn of the hat, Sara first made molds of the woven surface using dental molding putty and then cast paper pulp into them. The paper fills were cut to shape, toned, and adhered with wheat starch paste.
After the presentation, an audience member asked about storage recommendations for the hats. Sara responded that ideally each hat would have a custom form with some type of cover that would offer protection from dust but not touch the surface of the hat.
This was one of several talks in the Textile Session that discussed more 3-D textiles (or textile “objects”), which were of particular interest to me as an objects conservator (see Muppets, Egungun,and a Digitally Printed Reproduction Sleeve). Also check out this blogpost about a related talk in the Objects Session: “The Aftermath of Meds: Removing Historic Fabric Tape from Tlingit Basketry” by Caitlin Mahony.
44th Annual Meeting- Electronic Media Session- Recovering the Eyebeam Collection following Superstorm Sandy- by Karen Van Malssen
This presentation highlighted the risks to important collections that are located outside of traditional museum or library environments. Eyebeam, a non-profit multimedia art space was among the buildings inundated by flood waters in Manhattan’s West Chelsea neighborhood during Superstorm Sandy. Eyebeam is a collaborative workspace, rather than a museum with a “permanent collection,” but like many alternative arts spaces and contemporary art galleries with no “permanent collection,” Eyebeam maintains a collection of work created by former fellowship recipients (something that looks a lot like a permanent collection).
Just as many people in on the East Coast attempted to prepare for the storm, the art center’s staff had had underestimated the magnitude of Sandy’s storm surge, since the storm had been downgraded from the lowest level of hurricane strength on the Saffir-Simpson Scale. The staff members had worked diligently to raise equipment off of the floors and to cover furniture and equipment with plastic sheeting. Unfortunately, three feet of water flooded the interior of the building, causing the loss of 1,500 media items and $250,000 worth of equipment. The presenter showed a video demonstrating the extent of damage to the media archive, contaminated with foul, polluted, flood water. Recovery primarily involved rinsing in clean water, but recovery required more than just the treatment process.
The presenter provided a convenient, numbered list of lessons learned:
Lesson 1. Know Your Context: Assess known risks and anticipate the worst-case scenario. Eyebeam was located near the water, but the staff members had not anticipated catastrophic damage affecting the entire region.
Lesson 2. Maintain Contacts with Local Responders: Assembling a network of contacts in advance of the disaster will greatly improve response time; plan a well-designed scalable system for working with responders
Lesson 3. Train ALL Staff for Recovery: You never know who will be available in an emergency; Be prepared to break all procedures into simple steps for training. The two biggest risks during recovery were dissociation (separation of related parts or separation of labels and other identifying markings) and mishandling (outside expertise in video preservation may be scarce).
Lesson 4. Label Everything: This makes it possible to reunite parts that were separated during recovery.
Lesson 5. Make Hard Decisions in Advance: Maintain records of collection salvage priorities, so resources will not be wasted on low-value materials.
Lesson 6. Know What Roles You Will Need: Do not allow people to multi-task; each person needs a clearly defined scope of responsibility.
Lesson 7. Keep Critical Supplies on Hand: Regional disasters cause shortages of supplies that might be plentiful at retail under normal circumstances.
Lesson 8. Adrenaline Wears off: Schedule breaks from work, and assign someone to provide food, water, etc.
Lesson 9. Integrate Preparedness into Institutional Culture
Lesson 10. Strive to Avoid Negative Press: Many anonymous critics on social media complained that Eyebeam should not have maintained an archive of analog videos or hard copies of digital content, that all of the content should have been duplicated on some cloud server not affected by the storm.
Since the disaster recovery, Eyebeam has relocated to Brooklyn.
44th Annual Meeting – Workshop, May 14, "Gellan Gum Applications for Paper-based Objects"
I was very excited to see Gellan Gum Applications for Paper-based Objects listed on the workshops for AIC/CAC, but I was also a little worried about signing up. My familiarity with gums in paper conservation was limited to reading the odd DistList posting. Would it be too technical? Would I be in over my head?

I shouldn’t have worried. The facilitators from Library and Archives Canada and the Canadian Conservation Institute put me at easy immediately, and the group introductions reassured me I wasn’t the only novice in the group.
We began the morning with a presentation covering both a theoretical and practical introduction to gellan gum. Crystal Maitland did an excellent job of explaining the science behind the use of gellan gum without overwhelming us with too much technical detail. After the getting the theoretical grounding Doris St-Jacques, Greg Hill and Anne Maheux took over and shared some of the practical treatments which had been performed at CCI and LAC.
From there we headed down to the Canadian Centre for Architecture’s inviting lab. It’s always exciting to visit another institution “behind the scenes” and CCA’s facilities did not disappoint. Despite the large group everyone had their own workspace prepared for them with all the tools and samples we’d need for the day.
One of the real strengths of the workshop was exactly how much hands-on experience we gained. We split in to two groups to watch Doris and Greg prepare batches of gellan gum and then in to groups of three to give it a try ourselves. The process proved to be fairly simple, especially with the help of the excellent workshop leaflet. It included clear instructions and my favourite kind of diagram – one which does all the ratio math for me! In addition to the recipes the leaflet also included figures outlining the order of layers for different kinds of gellan gum cleaning and instructions for bleaching and deacidification. All together a very useful document.


Every participant was provided with a print which had been cut in to four sections for testing cleaning, deacidifying and bleaching. Many participants also brought their own samples. This was an excellent bonus, allowing everyone to see the effects on a wide variety of materials.

Each group began by mixing up their own batch of gellan gum. These set by the end of the day, allowing us to test our handy work, but the facilitators had also prepared a large number of sheets of with a variety of concentrations and additives. It was very informative to be able to play around with the assortment. Very few institutions have to resources to create such a wide variety of gels just to allow their conservators to gain the experience of the different properties, making this an invaluable experience
.
The gellan gum workshop accomplished something I was sure was possible at the start of the day. It allowed me to leave feeling confident enough in my skills that I’m looking forward to trying out gellan gum in my own lab. And if turning an intimidated rookie in to a confident tester isn’t the sign of a great workshop then I don’t know what is!

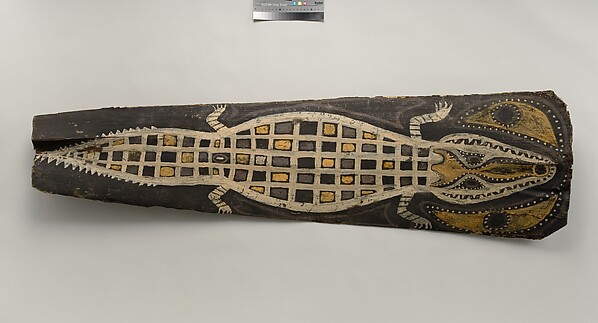
44th Annual Meeting – Research and Technical Studies, May 17, "Binders and pigments used in traditional Aboriginal bark paintings” by Narayan Khandekar
This was the last talk I saw at the meeting and was a perfect way to wrap things up, with a travelogue-slash-fascinating research project on the materials and techniques of Aboriginal paintings from the northern part of Australia. Narayan traveled to various art centers and museums to look at and sample pre-1960s paintings, talk to artists and gather local materials. He took about 200 samples from 50 paintings (including some from Harvard’s collection), the oldest from circa 1878. He also obtained materials from artists working today, some of whom took him around to gather materials from local sources, including the beaches of Bathurst Island (part of the Tiwi Islands off the coast of the Northern Territories – thanks Google Maps!). Back at Harvard, he and his colleagues (co authors were Katherine Eremin, Daniel P. Kirby & Georgina Rayner) gathered information on pigments, binders and other materials present that may indicate previous treatments. Narayan pointed out that only two samples of similar paintings had been analyzed and published before, such that this study presents entirely new information.

Of particular interest was the investigation into possible binders. Oral histories and documentary evidence recorded various possible binders, including turtle eggs and orchid mucilage, but it was generally thought that paintings made before the arrival of missionaries in the 1920s didn’t have binders at all (a similar question has been on my mind regarding the paintings made in the Sepik River region of Papua New Guinea). Binders were present in 77% of the samples analyzed. No proteins, waxes, fats or blood were detected. The analysis of the oldest paintings did reveal the presence of orchid juice, confirming that binders were in use that early. The techniques of using orchid mucilage could vary; the sticky juice could be mixed with the pigment, or laid down first before applying the pigments mixed in water.
As expected the pigments were largely ochres, and Narayan noted that the trace elements present in the samples provide a fingerprint that can in theory be used to begin to trace the occurrence of different ochres in different areas, but that more study and sampling is necessary to pursue this.

Other interesting findings included the use of dry cell batteries as a source for black manganese and zinc pigments on paintings from Groote Eylandt (yes a very great big island off the east coast of the Northern Territories); this area also shows the use of natural manganese-rich ores and charcoal for black pigments. A curious silver oil-resin paint on two paintings from the 1920s turned out to correlate with the roof repainting of a nearby lighthouse at the same time. The presence of DMP (dimethyl phthalate) in some paintings prior to 1957 resulted from the liberal use of insect repellent (FYI this is the main ingredient in Avon’s Skin-so-Soft; it fell out of use when DEET was invented). The presence of nitrocellulose on Groote Eylandt paintings was connected to records from the 1948 expedition suggesting that they had been consolidated with Duco.
As always, research continues, and Narayan mentioned that they would be looking further into the use of gums and of bloodwood, though I didn’t get down any details on that (I hadn’t actually planned to blog the talk, so apologies for any lacunae!). Also, I’m pretty sure there was a crocodile sighting mentioned, but that too didn’t make it into my notes, so here’s one of my favorites for good measure…
44th Annual Meeting, Paintings Session, May 17, 2016, “Experimental study on merits of virtual cleaning of paintings with aged varnish” by Giorgio Trumpy and John K. Delaney
Giorgio Trumpy presented interesting work he has been conducting on the “virtual cleaning” of paintings at the National Gallery, Washington, D.C. as a post-doc with John Delaney. He described a mathematical/- computer model which is being developed to predict and represent what a painting would look like after the removal of a yellowed varnish. The idea is not to replace the conservator, but to provide a tool in helping conservators visualize the results of such a treatment.

The model makes use of the contribution of the scattering (diffuse reflectance) of light from the surface of a painting with and without an aged varnished, after application of a fresh varnish, and from the interface of the paint layer and the varnish surface itself. Measurements were made on two paintings to obtain values for use in the model, and the optics of the yellowed varnish itself was estimated by measuring the transmittance through a solvent containing the dissolved yellow varnish.
The results give a pretty good indication of what the painting might look like after removal of the vanish. Click on the image* to see the animated .gif (it worked on my computer). There are differences with the paintings however as can be seen comparing the virtual cleaning image and the after (real) cleaning image. Trumpy thinks that the differences are due, among others, to the fact that the model does not account for local variations in varnish thickness or aging, and the use of the transmittance values for the yellow varnish as measured through the solvent.
In a follow-up e-mail van John Delaney I understood that the goal of the work is to better understand which factors are important for this kind of modelling work, and also to determine the limits of what the model can do. Still, I found it fascinating to see how far they had gotten.
______________________
* Image courtesy of G. Trumpy and J. Delaney, Scientific Research Department, National Gallery of Art, Washington, D.C.; detail from “Flowers in an Urn” by Jan van Huysum, c. 1720/1722, oil on panel,
79.9 x 60 cm.